
Genesis Mosaic Restoration in 2017. St. Jude Chapel, 1521 Main Street, Dallas, TX
2017 Repair and conservation of the “Genesis” mosaic façade at St. Jude Chapel in downtown Dallas, TX. Restoration work by Julie Richey Mosaics, LLC and Art Restorations, Inc. Video by Mark Birnbaum Productions. Photos by Danny Fulgencio.

The View from the Joule
Photographer Danny Fulgencio took a wide angle view of the mosaic site to give us this unique perspective.

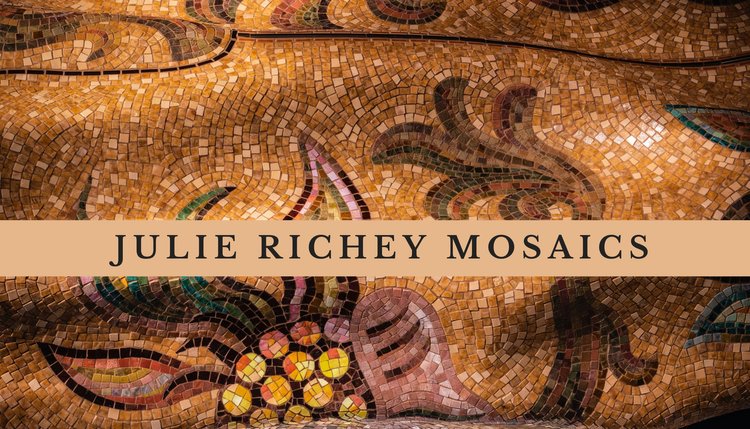
The Historic Palette
We were so fortunate to have a long time connection with Miotto Mosaics of Carmel, NY. Stephen Miotto is the godson of the founder of Venetian Art Mosaics Studios of the Bronx, NY. When that studio closed down, Miotto took over the stock of Italian glass tiles. We were able to pull colors from the same stock used to make the original mosaic. Venetian Art Mosaics Studios is responsible for several wonderful architectural mosaics created for Dallas institutions in the 1960s.
Photo by Mark Lefkin.
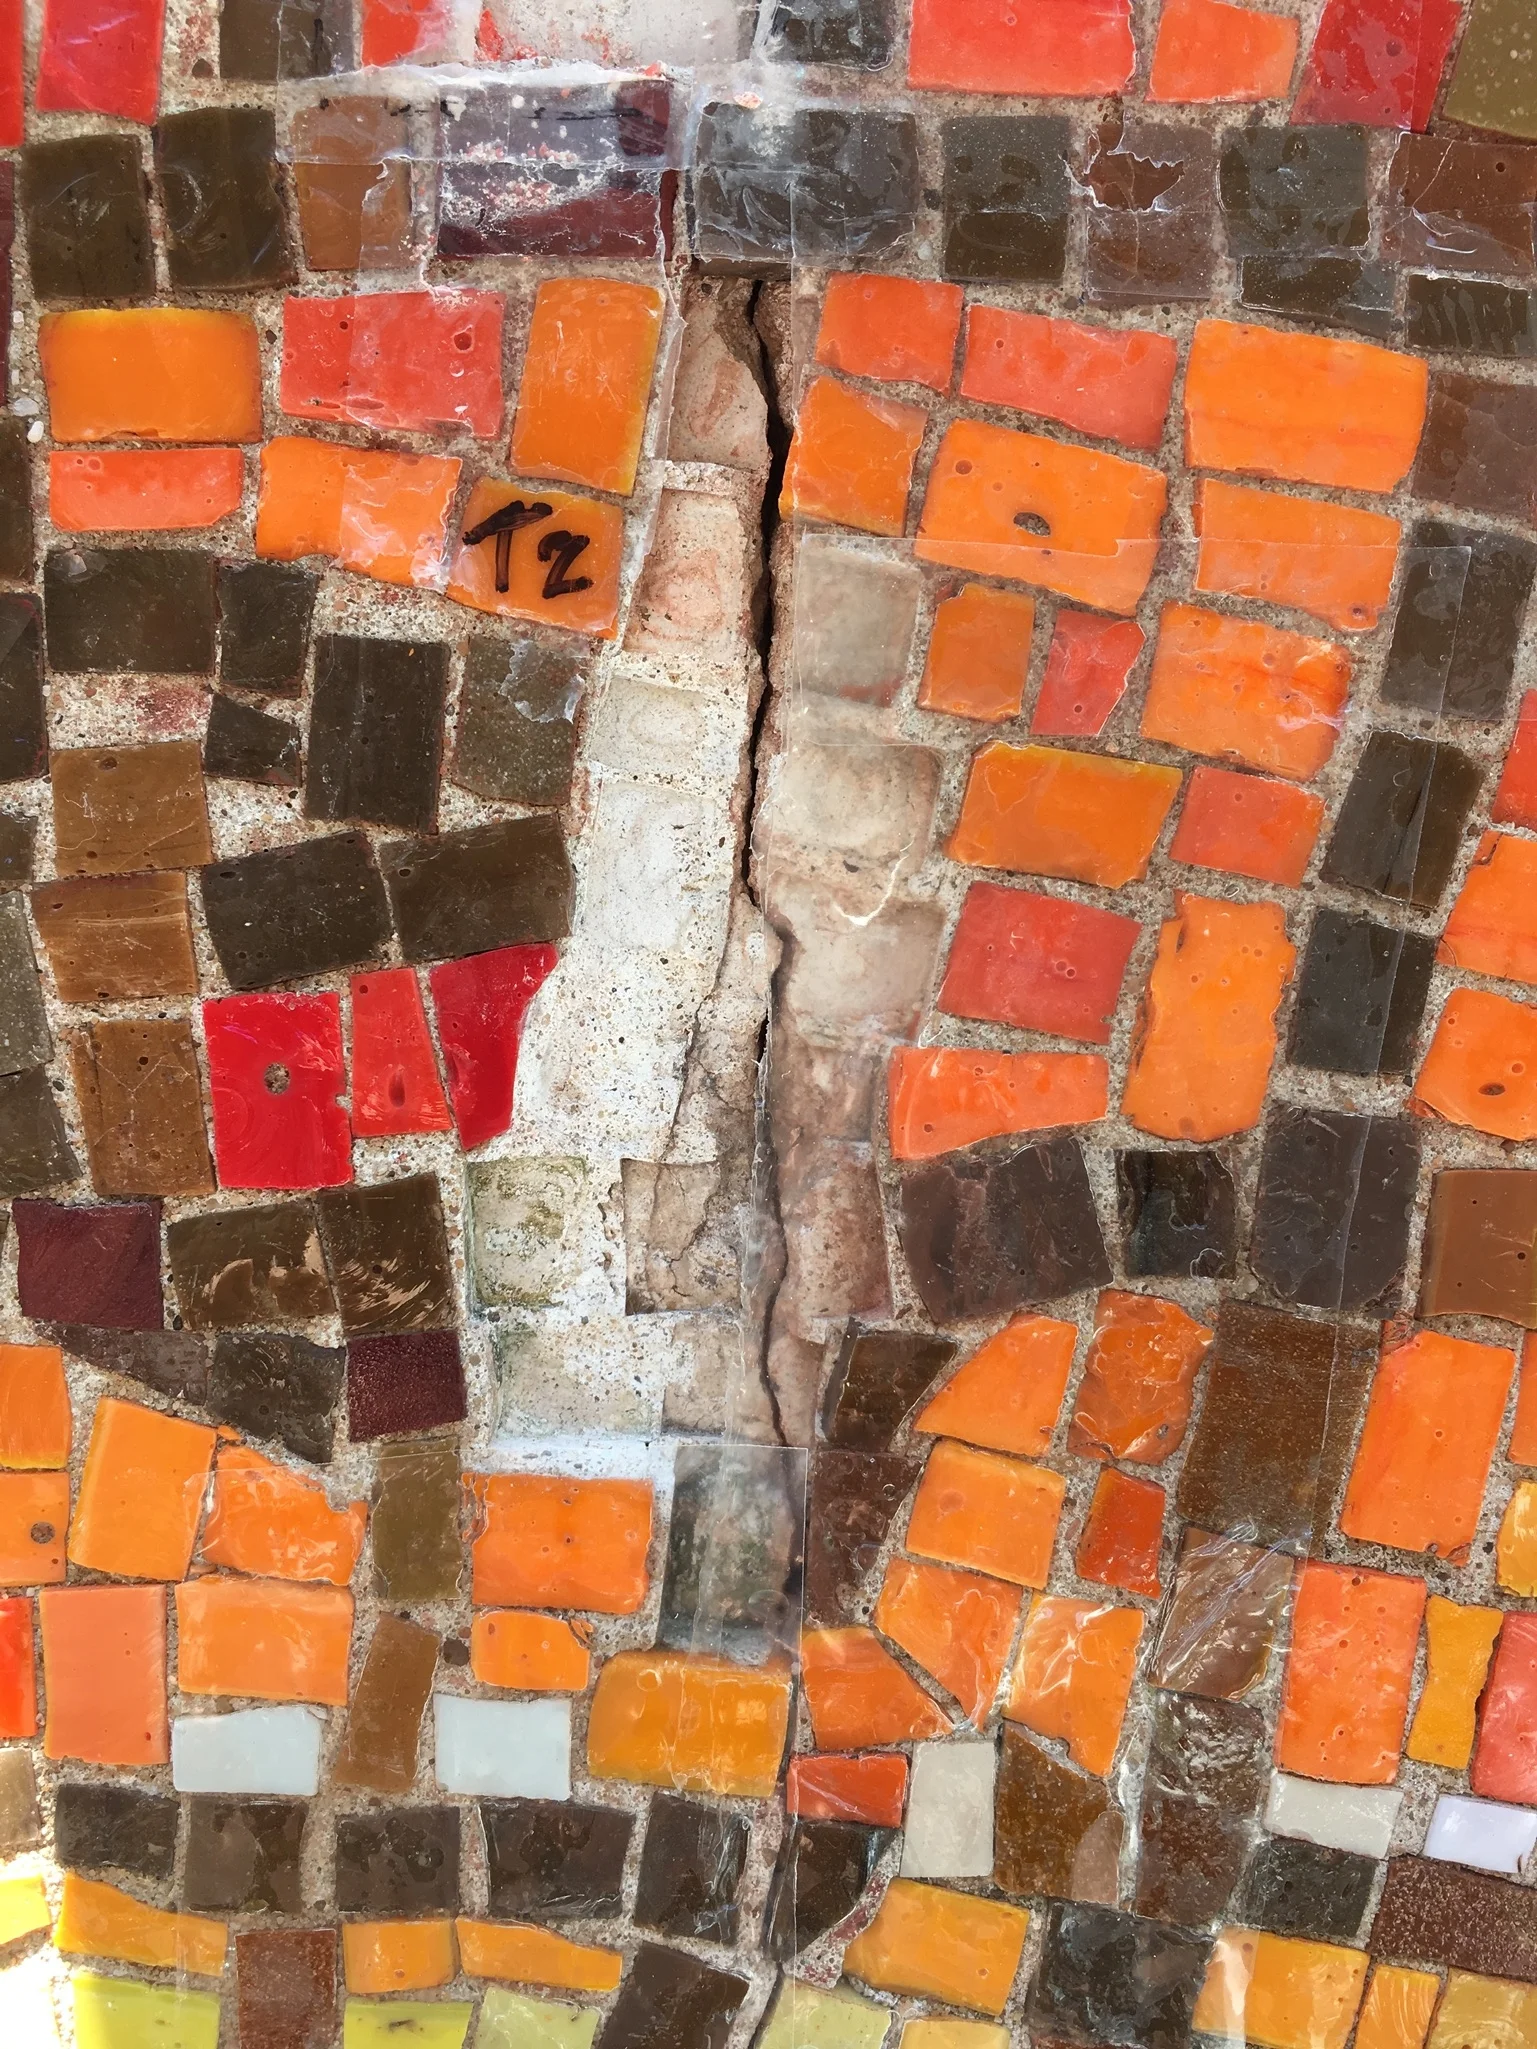
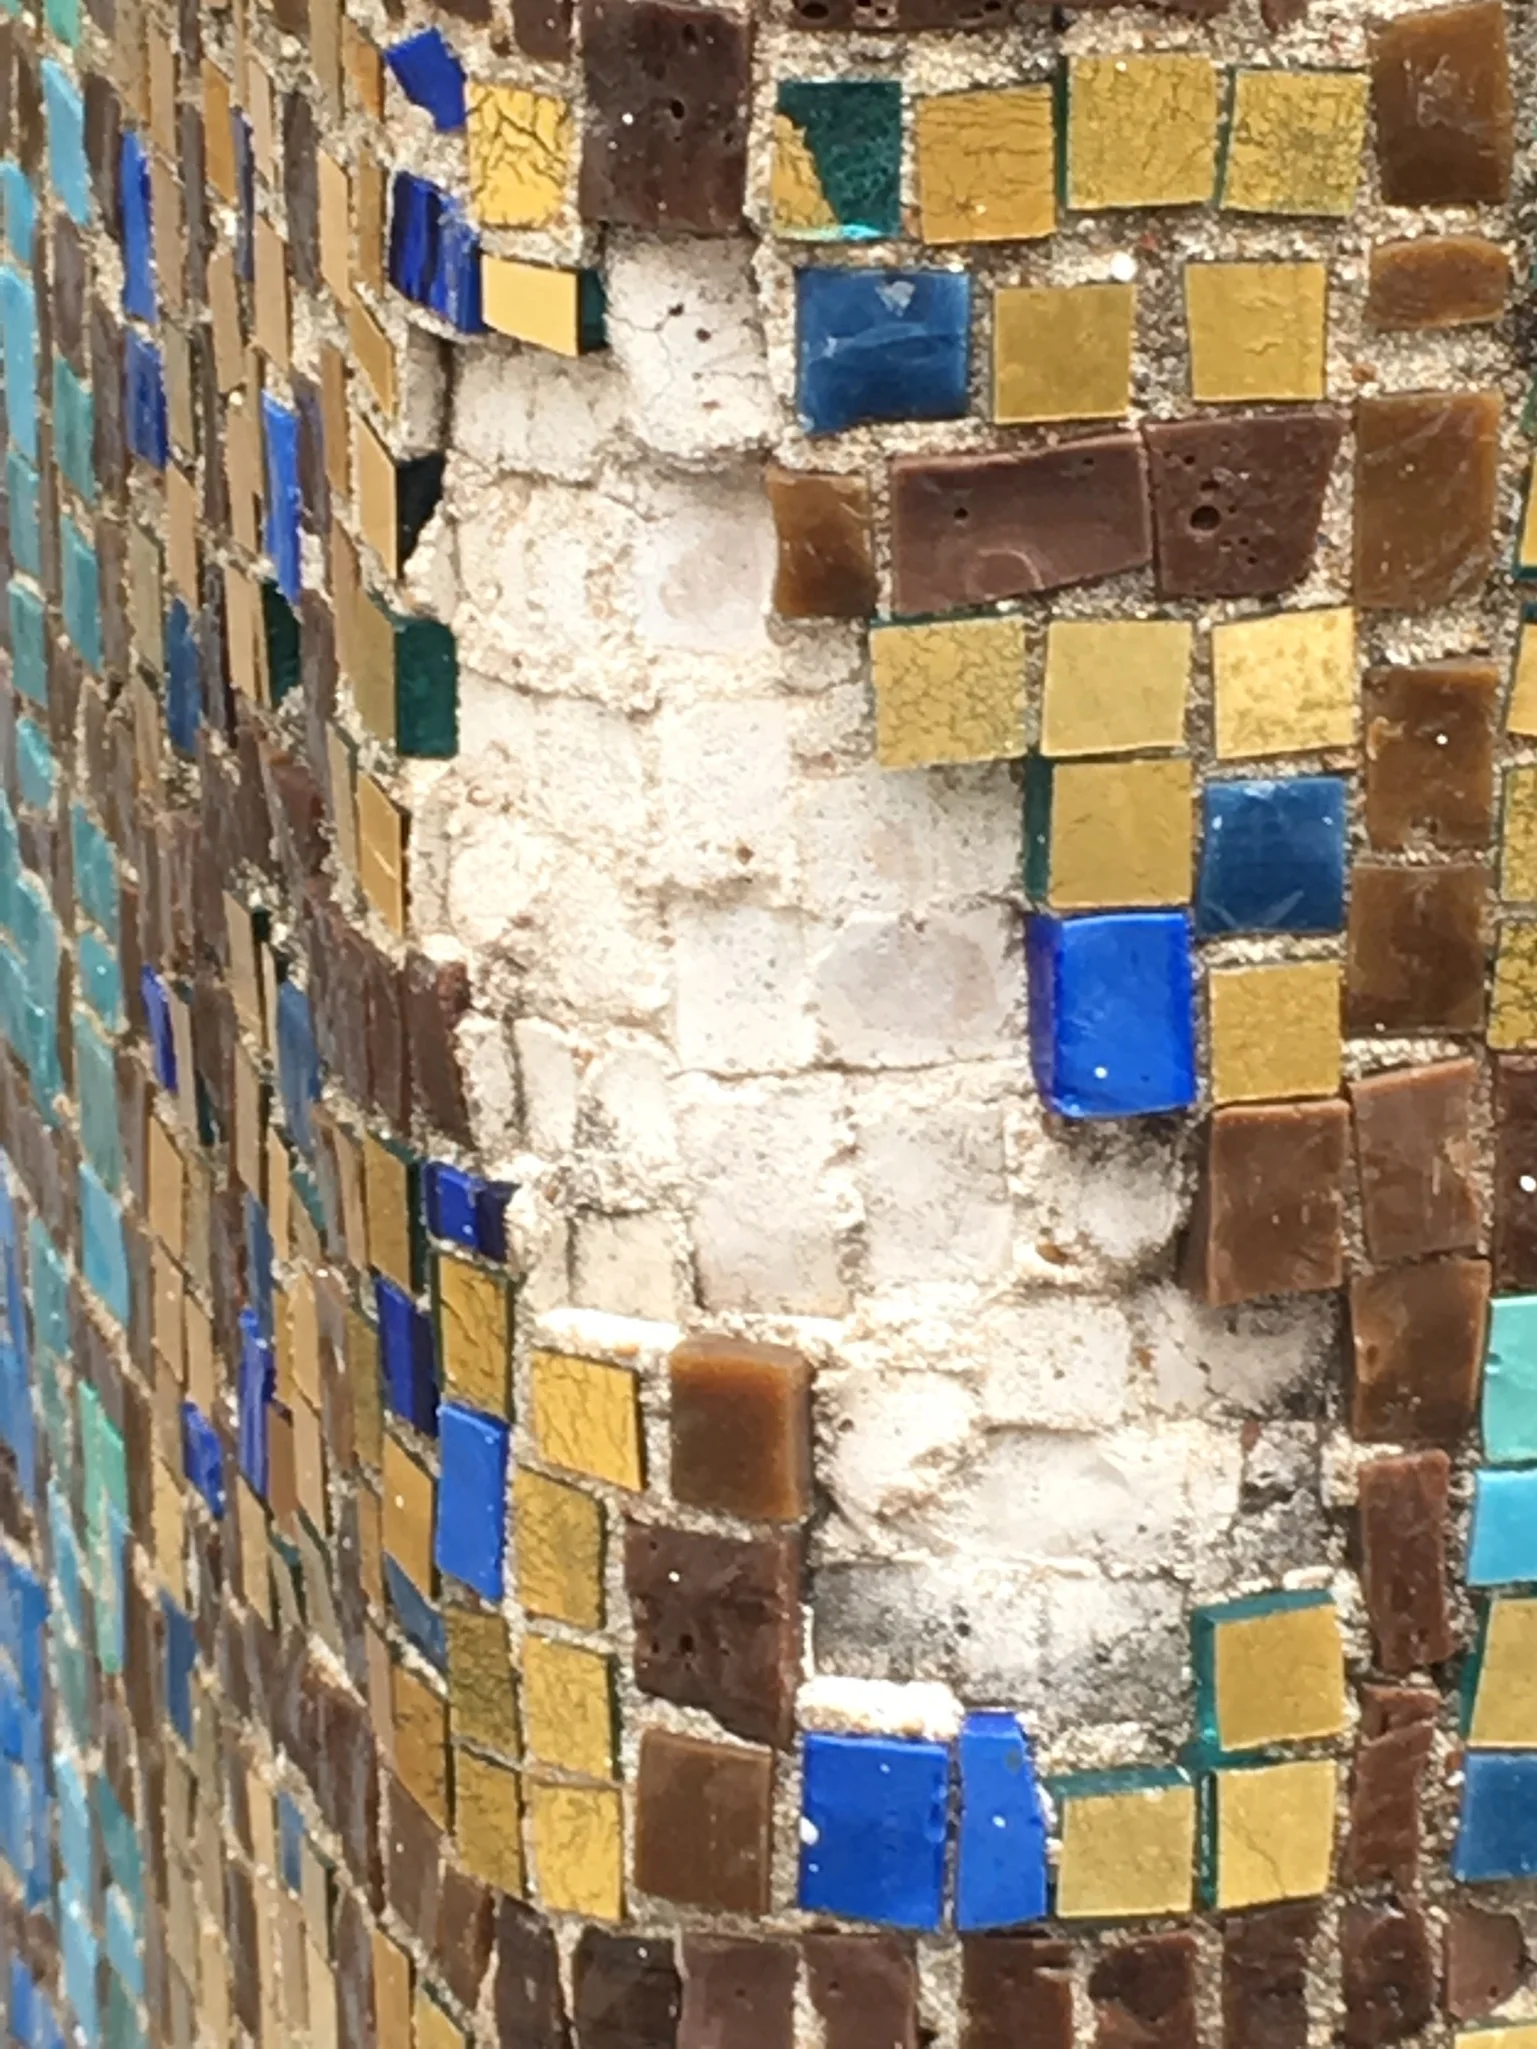
The Fracture
Here's an example of the state of the mosaic when we removed the silicone that was added years ago to stop the fallout of tiles.
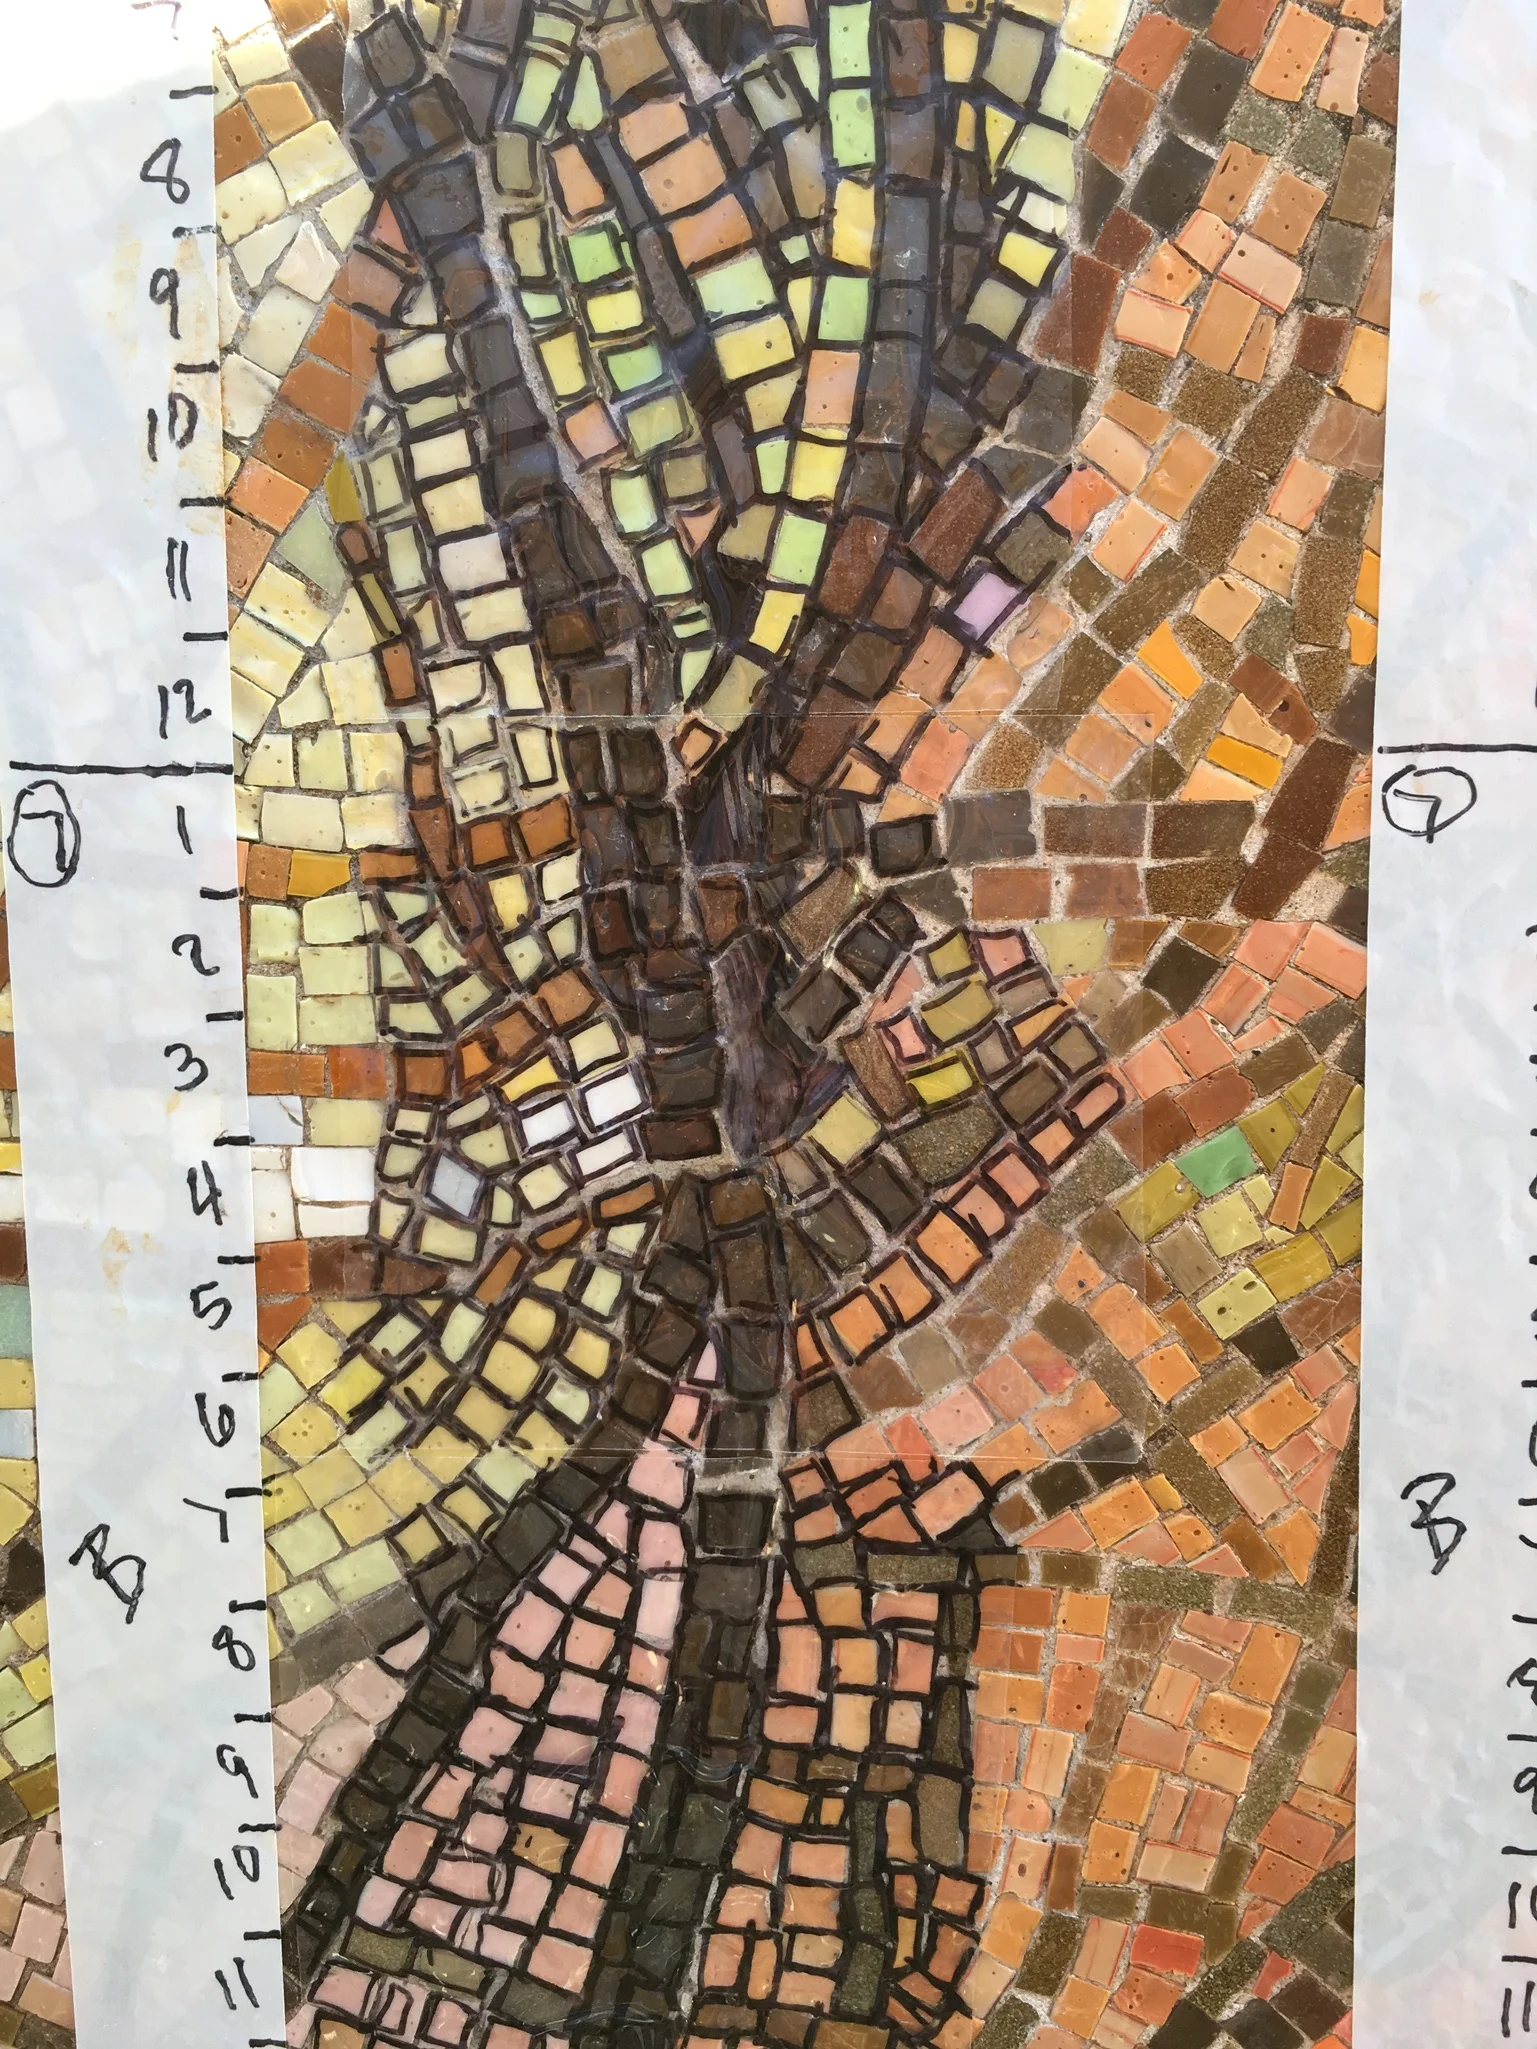
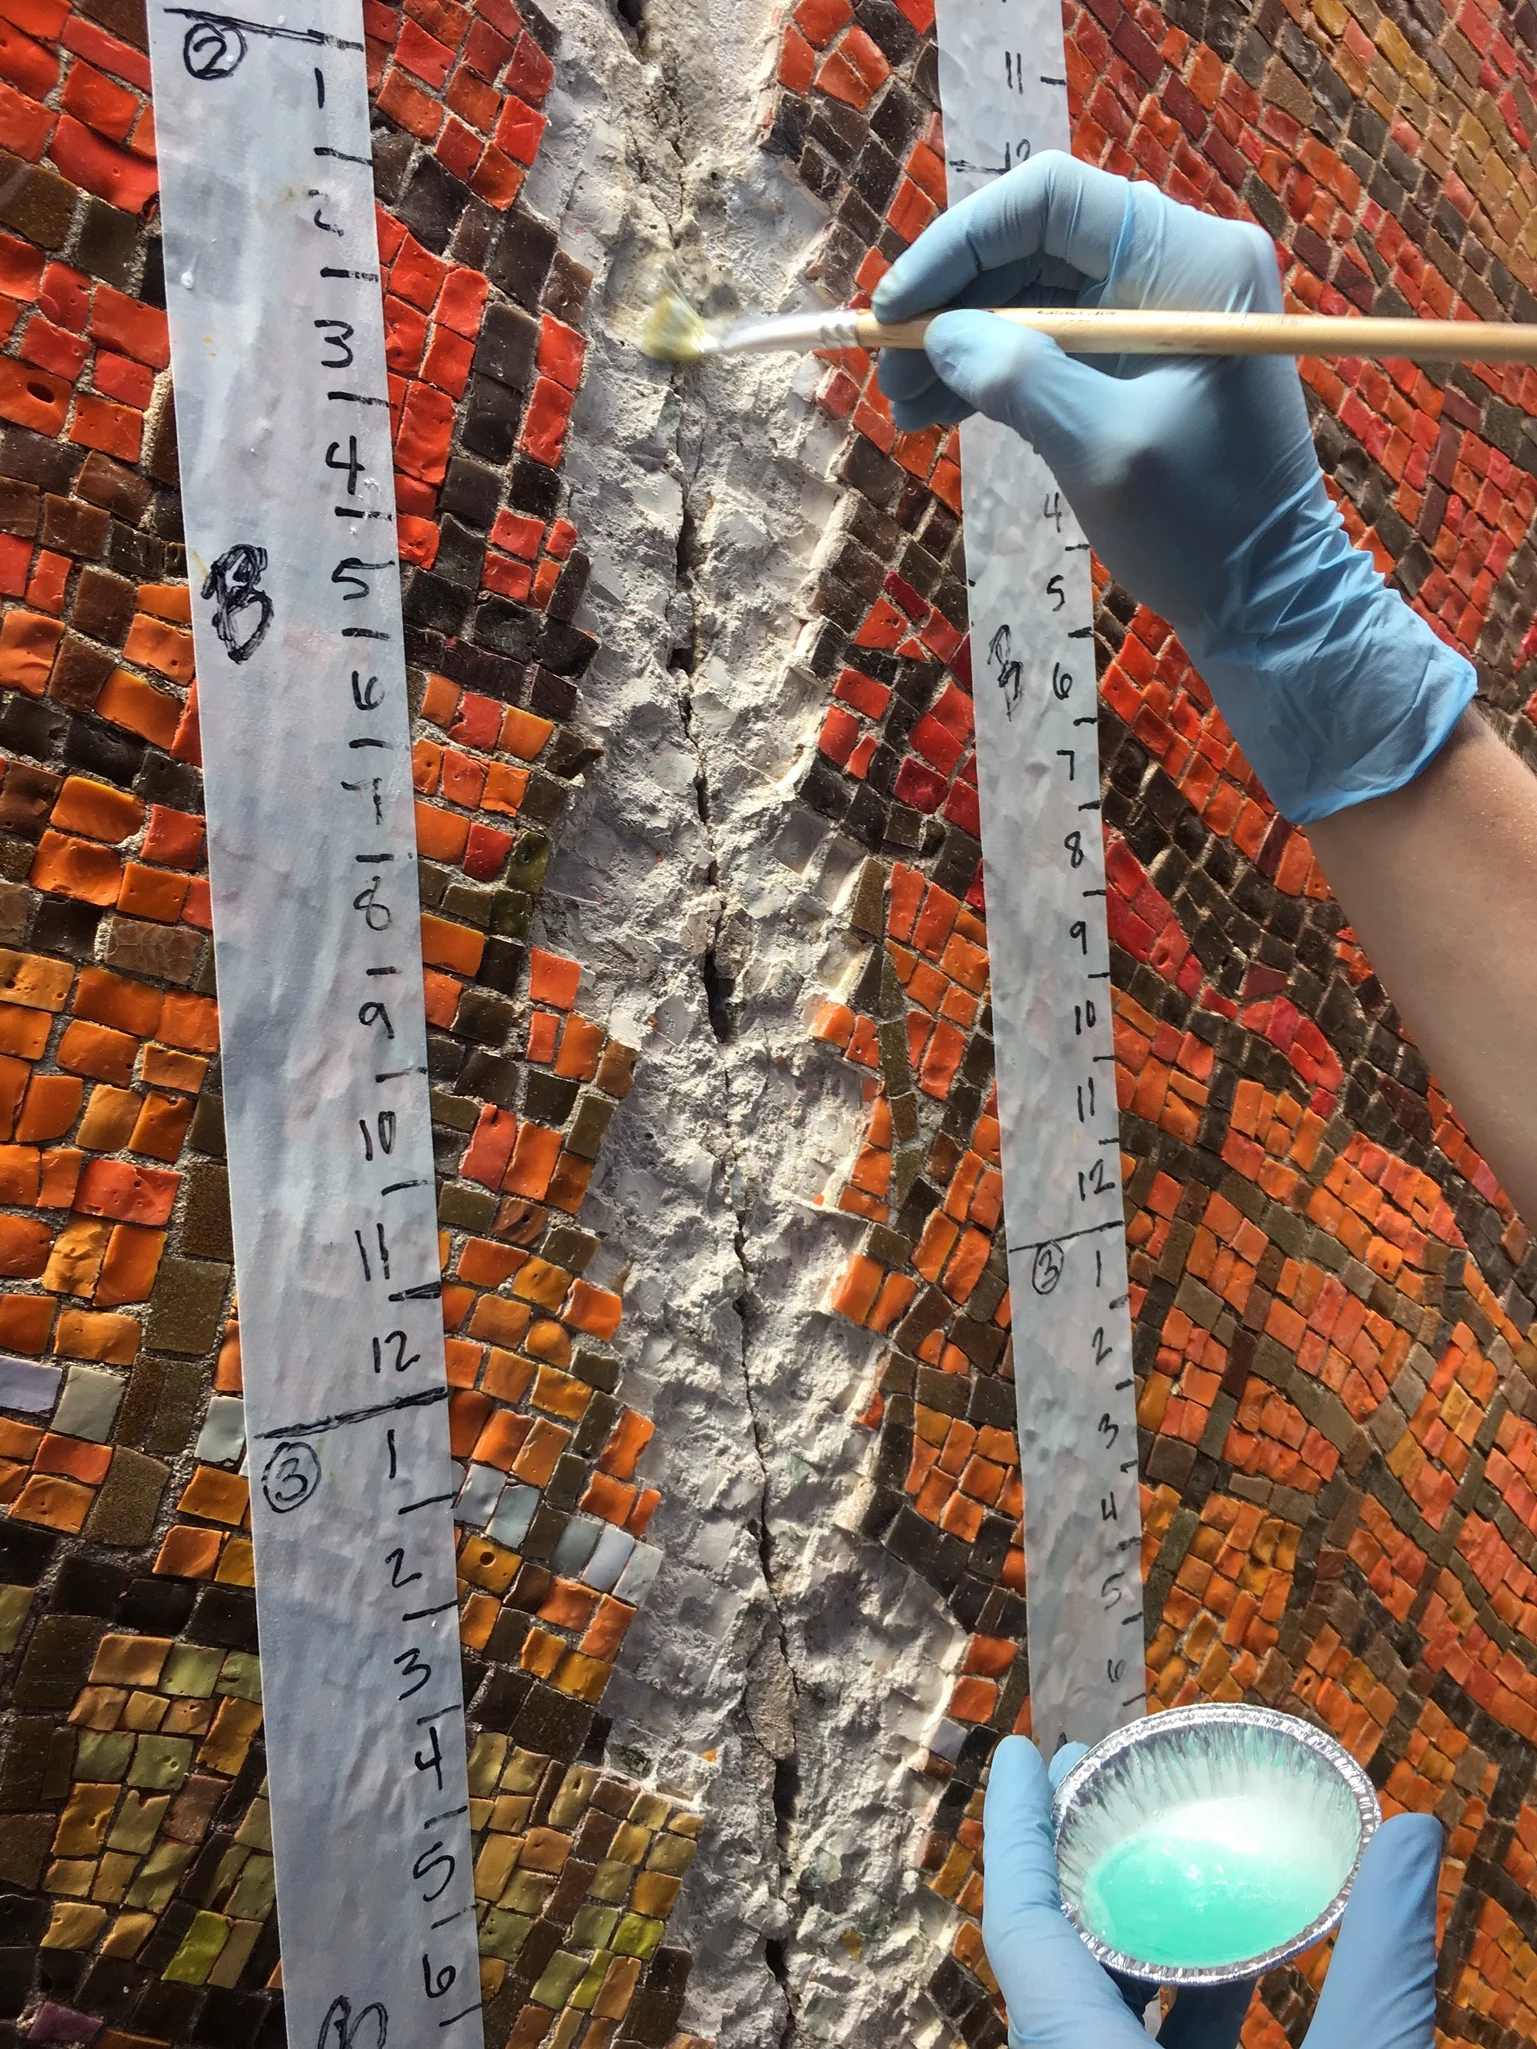
Mapping the tesserae
Clear mosaic tape was used to capture the andamento, or pattern, of the tile before chiseling to remove tiles surrounding the fracture. Tiles were removed in 6" sections.

The Fixers
The principal players involved in the restoration project: Cher Goodson, owner of Art Restorations of Dallas; Plano mosaicist Lynne Chinn of LCMosaics.com; Reverend Jonathan Austin, St. Jude Chapel chaplain; Julie Richey of Julie Richey Mosaics and Callie Heimburger, conservator at Art Restorations.
Photo by Danny Fulgencio.

Removing the crumbling substrate
Callie and Julie use small stone chisels to remove the cracked and crumbling mortar.
Photo by Danny Fulgencio.
Surprise!
We understood when we embarked on this preservation project that there were possibly more areas damaged than appeared on the surface. We were disappointed to find a horizontal fracture invisible from the street, which traversed the two vertical fractures. We treated this fracture with the same care as the verticals. Fortunately it wasn't too deep.
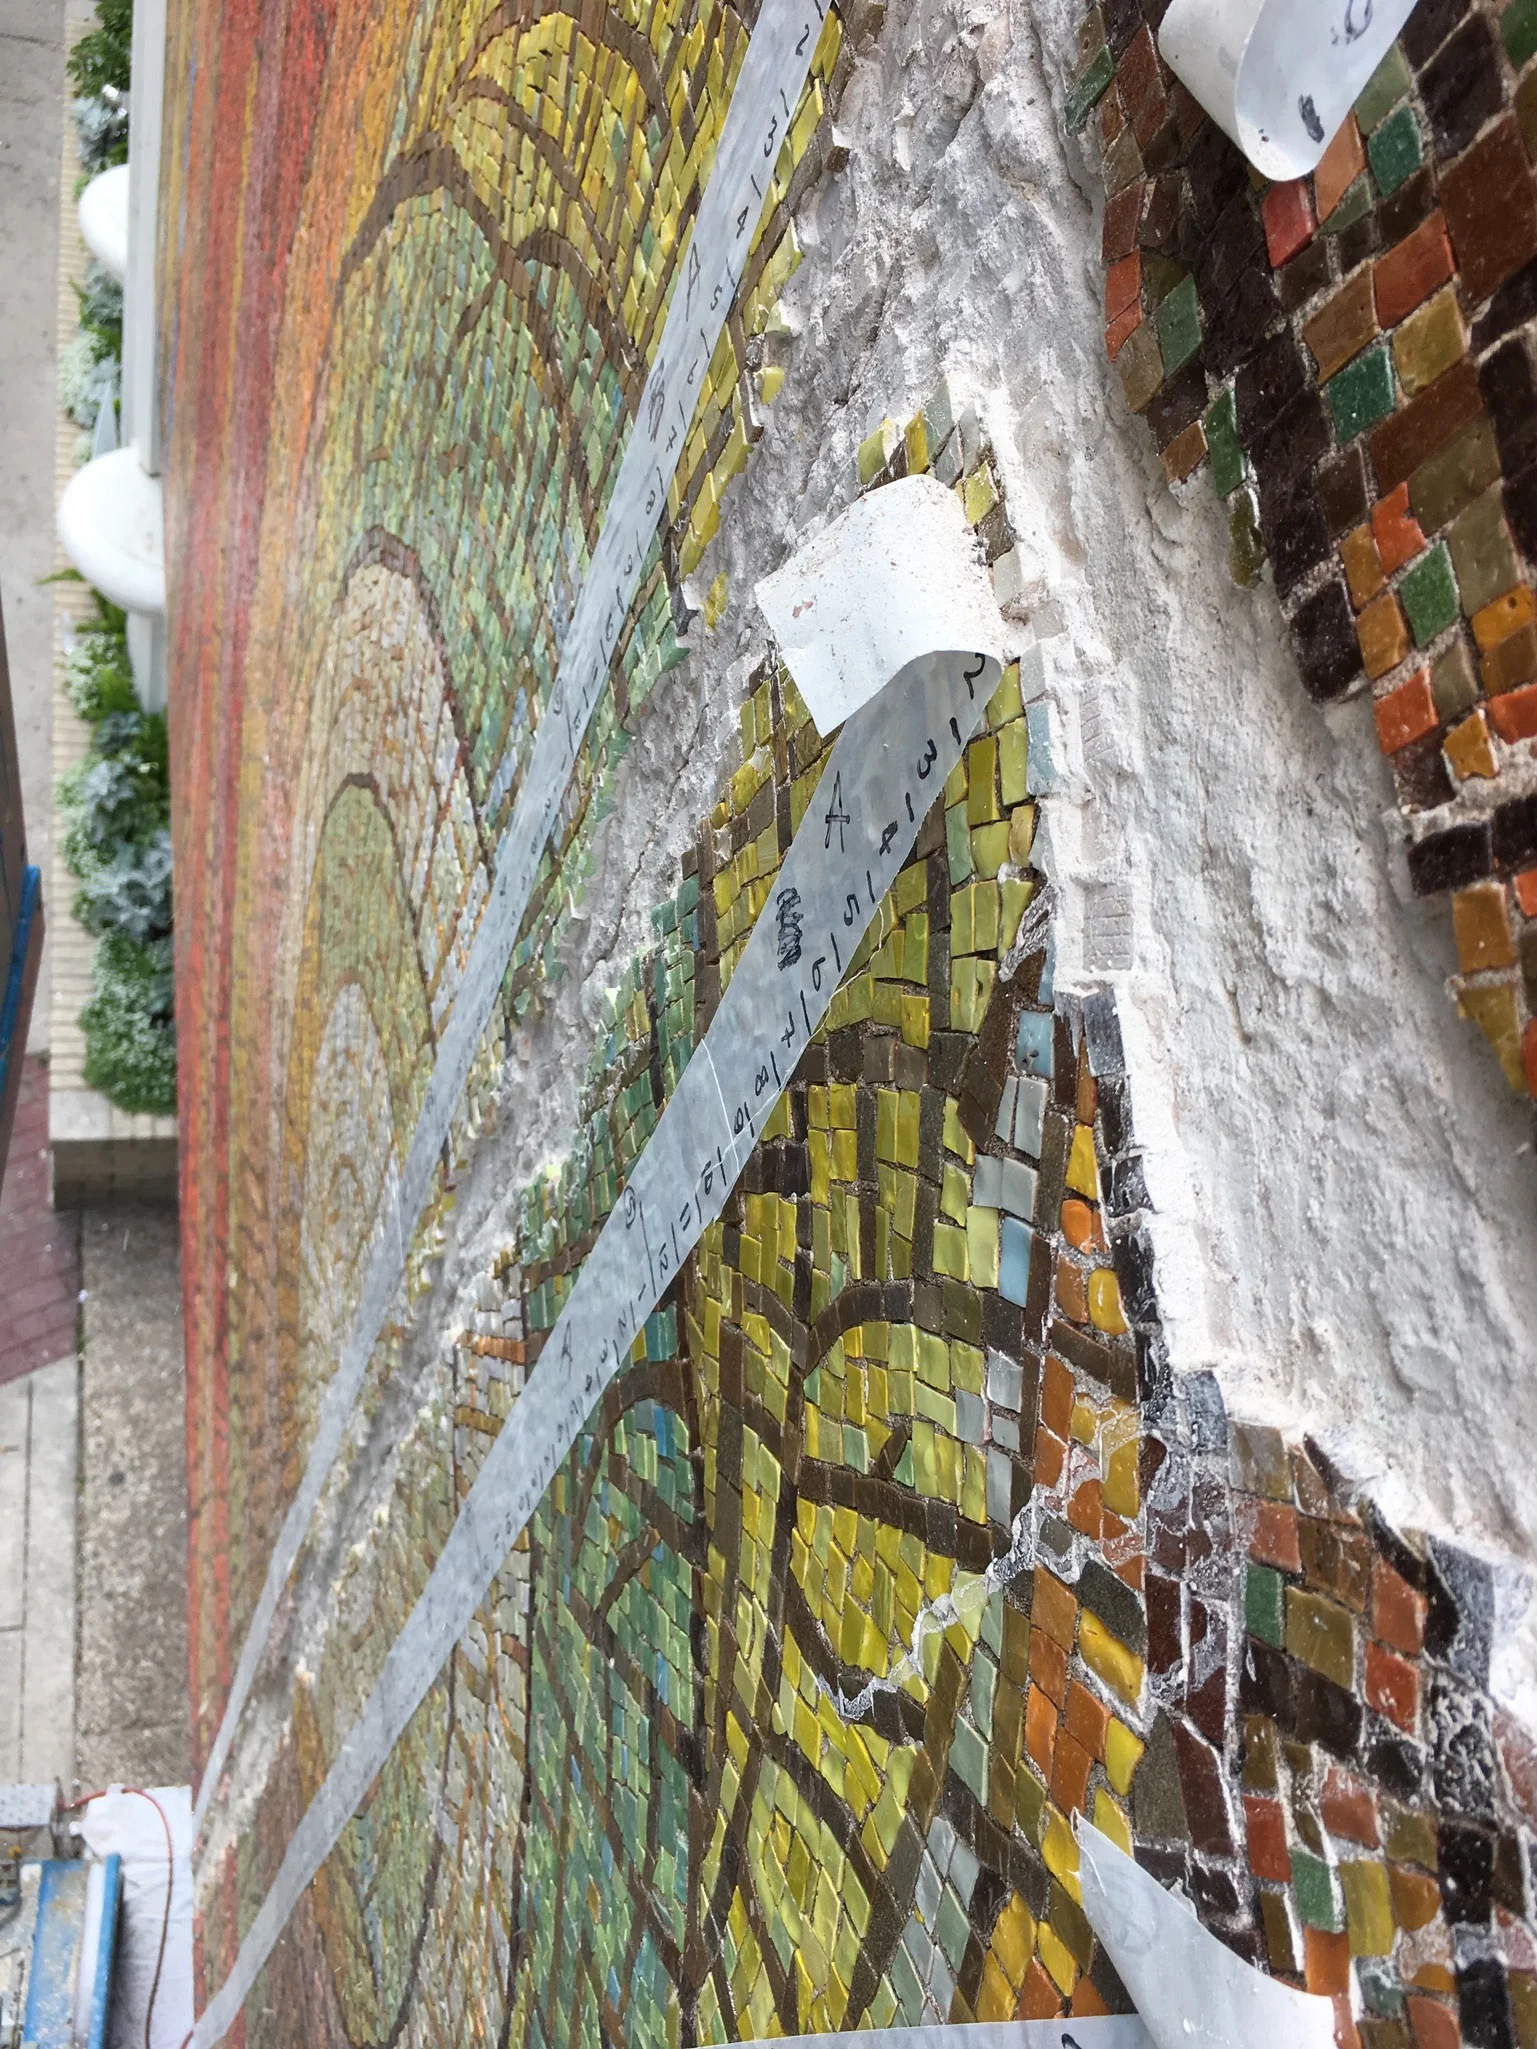
The Curve
An interesting detail of the mosaic is the curve on the southern side of the façade. This area is almost completely covered in 24k gold leaf Venetian glass. It's beautiful, but very thin tile. The mortar here is very fragile. Attempts to prepare the surface for just a few tiles to be reseated resulted in twice as many falling out. We waterproofed the area and made an invisible repair.
Eliminating mildew
Mildew growing behind the tiles forced many of them to de-laminate. The fractures, most likely caused by the building's settling event, then leaked water due to improper flashing on the roof. Now that the roof has been repaired and the mosaic isn't subjected to water damage from behind, the fracture is dry. The mildew was neutralized with a bleach gel.

Color palette
We removed loose and damaged tiles surrounding the two vertical fractures. We counted 140 distinct colors in these two, thin cross sections. This doesn't begin to quantify the colors on the outer reaches of the mosaic: malachite and lime greens, azures, violets, pinks, tangerines and 24k gold leaf tiles.
Photo by Danny Fulgencio.

Callie assembling pages of mosaic
She became our impromptu PR rep when curious passers-by stopped to ask about our project.
Photo by Danny Fulgencio

Recreating the sections
Once we carefully documented the areas to be removed, cleaned the tiles and received replacements from the stock at Miotto Mosaics Studios in NY, we were ready to rebuild.
Using both printed "before" photos of the mosaic and our iPads and iPhones (for easy enlargement of the details), we were able to identify original tiles and put them right back next to their neighbors. A classic example of ancient craft and modern technology working together.
Photo by Danny Fulgencio.

Puzzle Time
Careful attention to color, shape and pattern allow our three "puzzlers" to rebuild the missing sections using high-res colored photos, as well as iPads and iPhones for their photo enlargement capability,
Photo by Danny Fulgencio.

Christina, volunteer and parishioner.
Christina spent a whole day helping us clean and bleach the tiles for reuse.
Photo by Danny Fulgencio.

St. Jude and Genie
Photo by Danny Fulgencio.

Beginning the Rebuild
Julie Richey begins at the bottom of the small fracture, replacing tiles from the pattern.
Photo by Danny Fulgencio.

Placing the anti-fracture membrane
We're fortunate to have a great local rep from Laticrete International, the company that provides our mortars, grouts and anti-fracture compounds. In this case, it was Hydro Ban Anti-Fracture Tape to the rescue. We coated the seams with Hydro Ban, then applied thinset and the custom-cut membrane. This provided a stable base for the replacement mosaic, and we are confident that the membrane will keep the old fractures at bay.
Photo by Danny Fulgencio.

Cyril's Birds
The facilities manager cares for the local pigeons. They often perch on the sign to watch our progress.
Photo by Danny Fulgencio.

Reflection
Photo by Danny Fulgencio.

Re-piecing begins
It takes three to accomplish this task: Callie on the right is working on the thinner fracture; the wider fracture requires a tracker (Lynne) and a fixer (Julie) to keep the tesserae and patterns in line.
Photo by Danny Fulgencio.

That tile, that spot.
Highly detailed photos allow the team to confirm the exact tiles, based on their characteristics, are put back in place.
Photo by Danny Fulgencio.

Almost finished
The replacement of tiles along the fractures is almost complete. Next up: spot grouting low areas, cleaning and replacement of randomly missing tiles across the façade.
Photo by Danny Fulgencio.
The Red Wash 2
Conservator Callie Heimburger created a special "wash" of Indian red and burnt umber to re-stain the old and new grout areas. This process was used in the installation of the original mosaic in 1968. We know this because we found traces of the pinkish-red stain under the loose tiles. Traditionally, a wash like this is used to unify the design by coloring joints and mortar to match the intensity of the glass tesserae.
To see another version of this technique locally, visit the Covarrubias Genesis mosaic at the Dallas Museum of Art front entrance.
Video by Julie Richey.

The St. Jude project was featured in a documentary by Mark Birnbaum Productions in July, 2017.
Watch: Conservation Team Revives Dallas Mosaic http://artandseek.org/2017/07/25/watch-conservation-team-revives-dallas-mosaic/
St. Jude Chapel Restoration